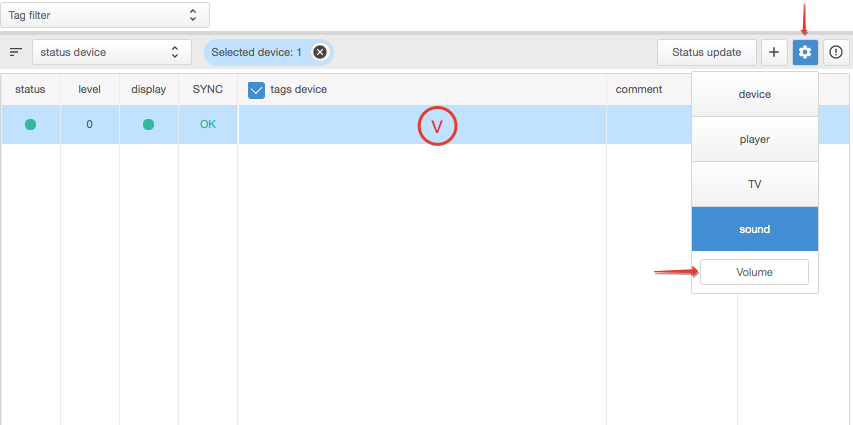
Let’s configure our device to display demo content.
DS-GO.PRO provides the ability to play content in two independent video layers (Layer 1 and Layer 2). Each layer can have an individual template, a set of tags, and therefore a different set of content. The difference between layers is the priority of displaying the content published in them: files published in Layer 1 will be played, interrupting and pausing the playback of files published in Layer 2.
In this example, we will set up a playback scheme using both Layer 1 and Layer 2.
In the first layer (Layer 1) the advertisement will be played on the entire screen, and in the second layer (Layer 2) the background content, banners and weather widget will be played.
- After registering the device, click on it and go to the Projects section.
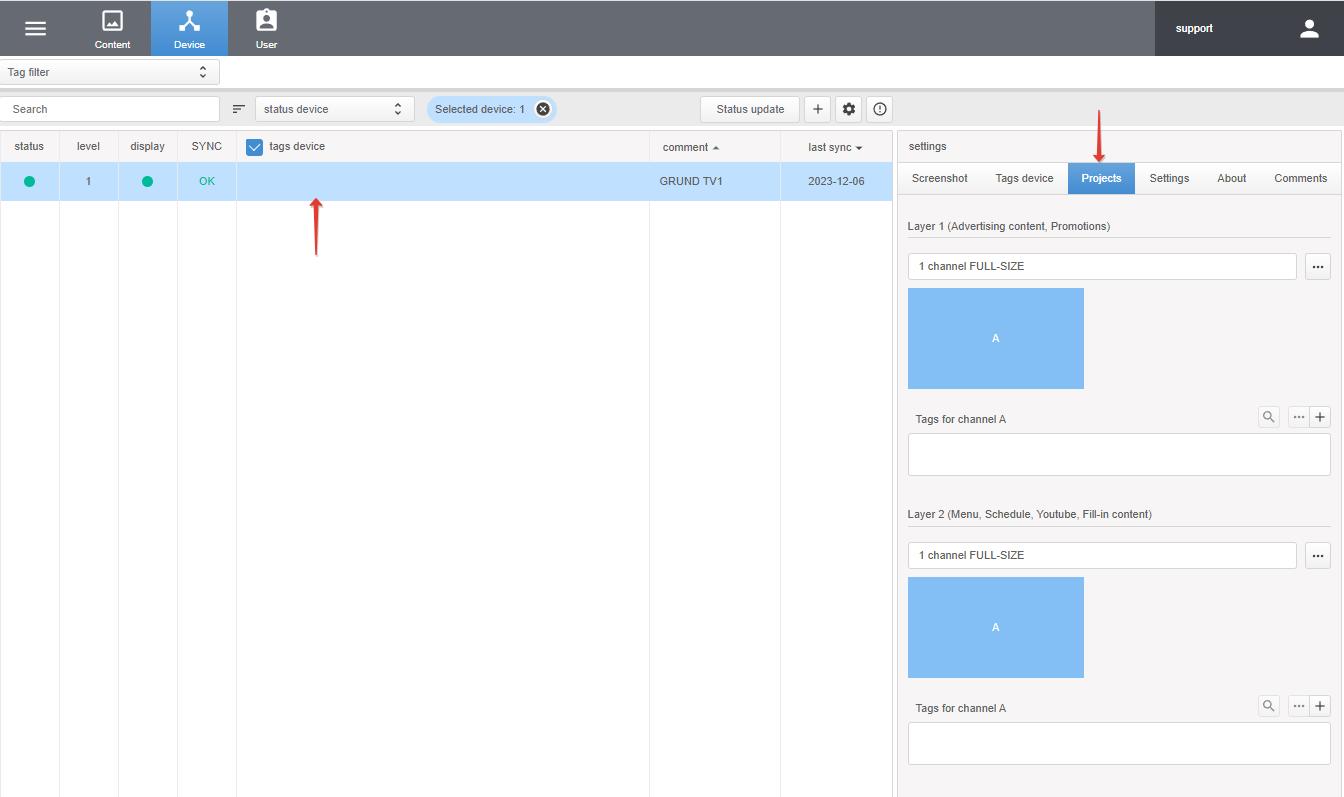
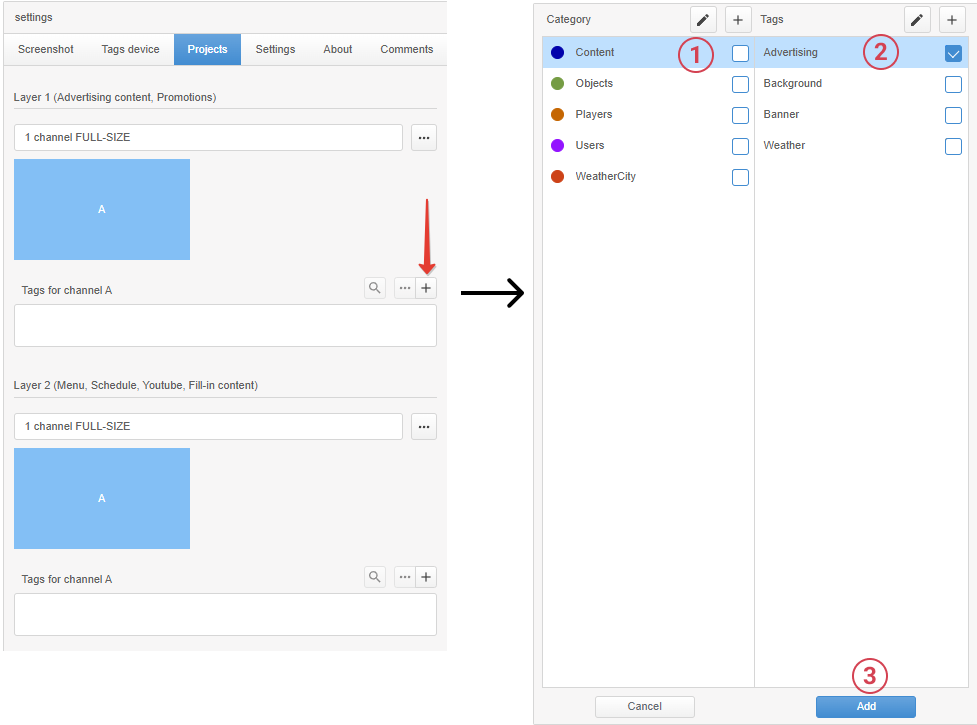
- Layer 1 already has a default template that suits us. We need to specify a tag for a single zone of the template.
To do this, click on “+” and select tag Advertising.
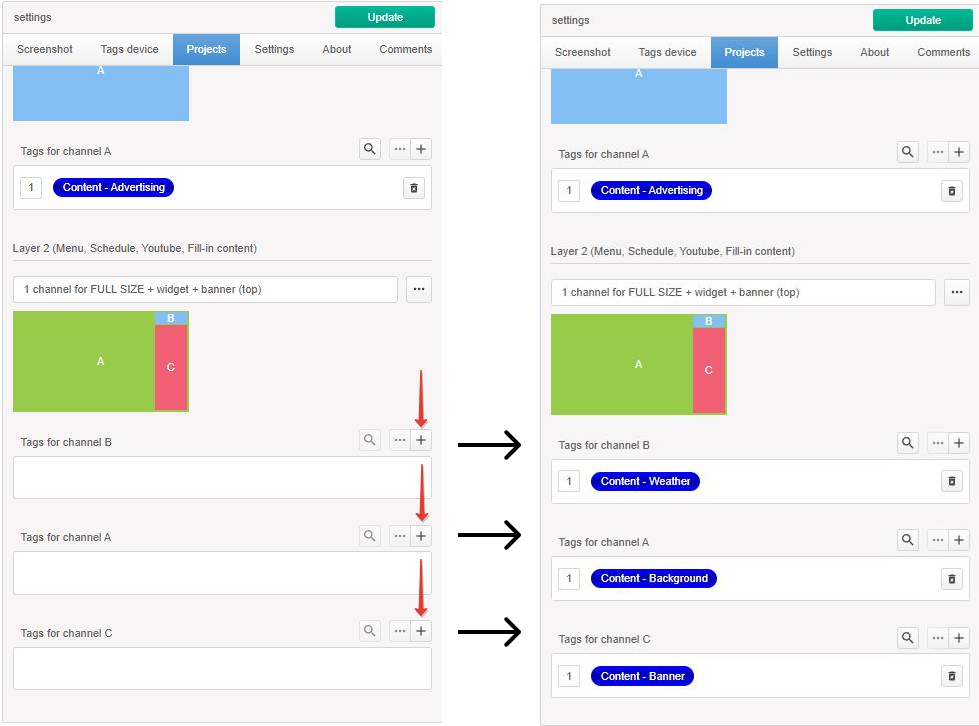
- for Layer 2 select a template with 3 zones. Click on “+” and select 1 channel FULL-SIZE + widget + banner (bottom)
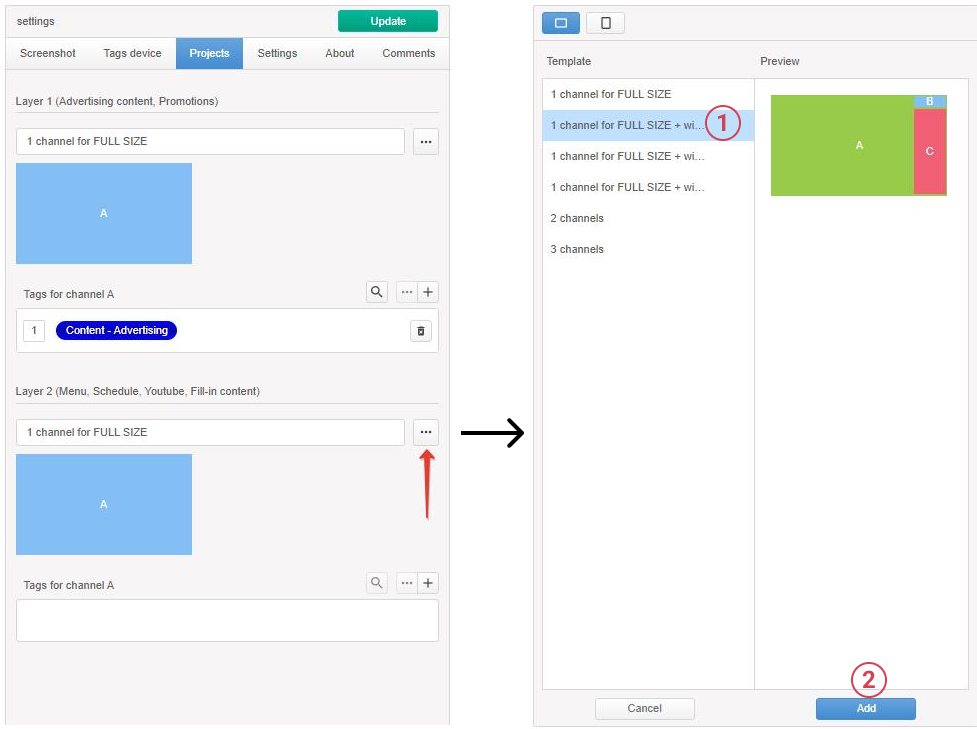
- this template has 3 zones. We need to select a tag for each of them.
For zone A tag Background.
For zone B tag Weather.
For zone C tag Banner.
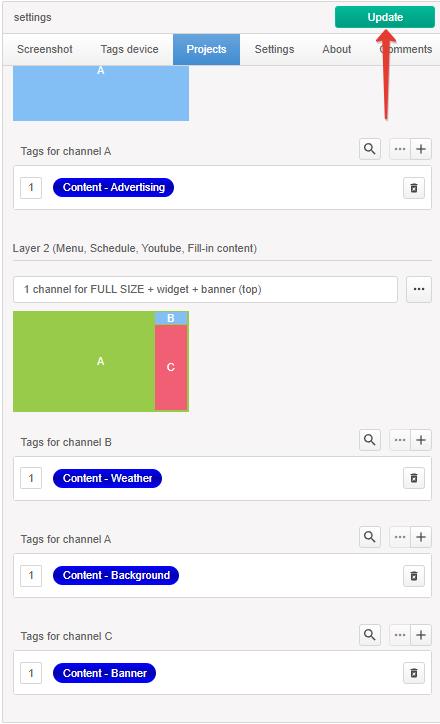
- To save the settings, click Update.
If you plan to use the audio track of video content or audio files, set the desired device volume.